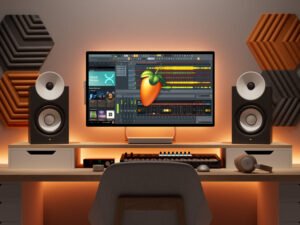
Whether you’re an aspiring musician looking to make your mark or simply keen to enhance your music production skills, diving into the world of Ableton Live could be your game changer. Recognized far and wide for its intuitive design and powerful capabilities, this Digital Audio Workstation (DAW) software stands out as a superior choice for music creation, offering a truly enjoyable and creative experience.
By mastering Ableton Live, you unlock a universe where your musical ideas can flourish, thanks to its unique Session view for jamming out song sections and the traditional, linear Arrangement view for meticulous track construction. Additionally, navigating through its vast library of sounds, instruments, and plugins is made effortless with the Browser feature, signifying endless possibilities for your tracks.
Getting Started with Ableton Live
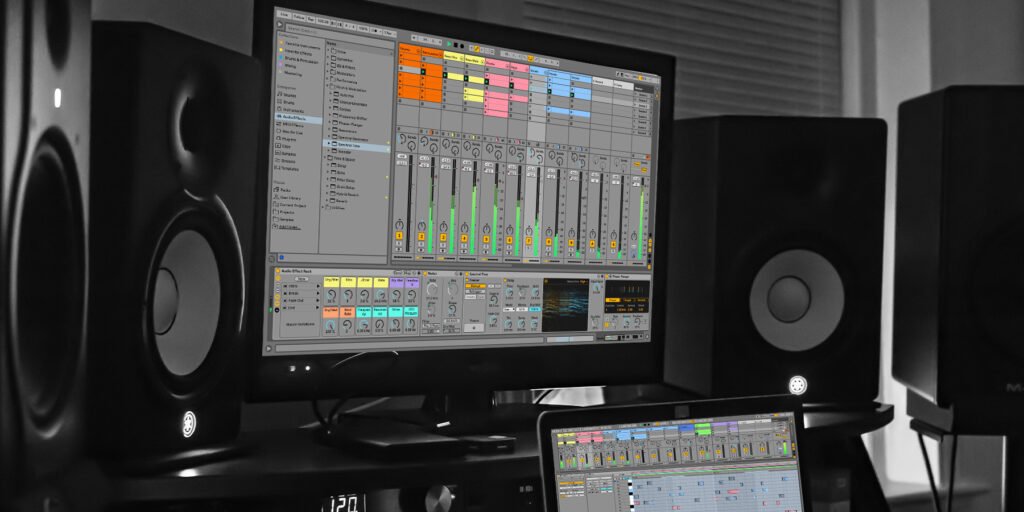
Embarking on your journey with Ableton Live begins with understanding its layout and the pivotal role of its two main views: the Arrangement View and the Session View. These views form the backbone of your music production and live performance capabilities, offering unique approaches to laying out and experimenting with your musical ideas.
Navigating the Interface
- Browser View: Accessible on the left side, toggle the browser view using the triangle at the top left to explore Ableton Live’s vast library. This is where you’ll find instruments, effects, samples, and your collections.
- Info View: Found at the bottom left, this can be shown or hidden and is essential for getting detailed information about the elements you’re working with.
- General Controls: Includes transport controls for play, stop, and record, along with tempo and timing controls, MIDI mappings, and the all-important Browser.
Understanding Views
- Arrangement View: Ideal for the traditional linear music production process, allowing you to place and arrange clips over time.
- Session View: Designed for live performance and experimentation, enabling you to launch clips in a non-linear fashion, perfect for trying out different arrangements and ideas on the fly.
Setting Up Your Workspace
- Audio Interface Setup: Navigate to ‘Preferences’ > ‘Audio’ > ‘Audio Input Device’ to select your audio interface, ensuring high-quality audio input and output.
- MIDI Controller Setup: Under ‘Preferences’ > ‘Link/MIDI’ > ‘Control Surface’, select your MIDI controller and check ‘Track’ and ‘Remote’ for seamless integration and control.
- Creating Tracks and Adding Sounds:
- For audio tracks, you can directly drag audio files into the Arrangement View. MIDI tracks, however, require loading an instrument from the Browser.
- Experiment with warping audio clips for precise timing and pitch adjustments, and explore Ableton Live’s rich collection of instruments, effects, and sounds to enhance your project.
Getting started with Ableton Live is an exciting step towards unleashing your musical creativity. By familiarizing yourself with the interface, mastering the use of both main views, and setting up your audio and MIDI devices, you’re well on your way to crafting your first track. Remember, the Browser is your gateway to Ableton Live’s extensive library of sounds and tools, so dive in and start exploring the possibilities that await.
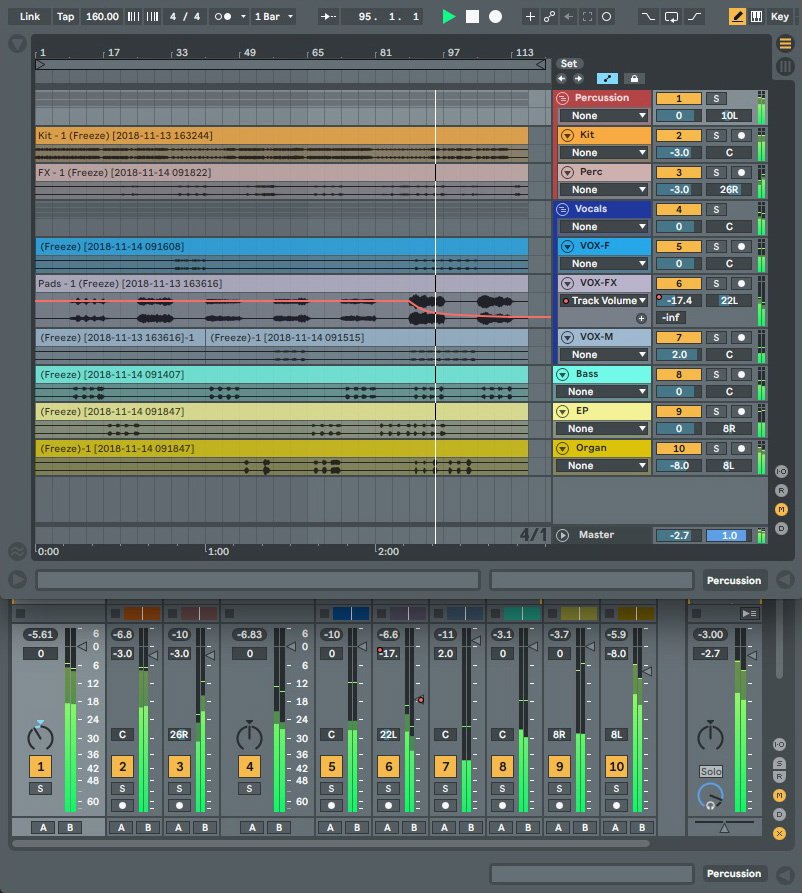
Exploring Ableton’s Sessions and Arrangement Views
Diving deeper into Ableton Live’s core, you’ll encounter two pivotal workspaces: the Session View and the Arrangement View. Each serves a unique purpose, catering to different phases of your music production journey. Let’s unpack these views to harness their full potential:
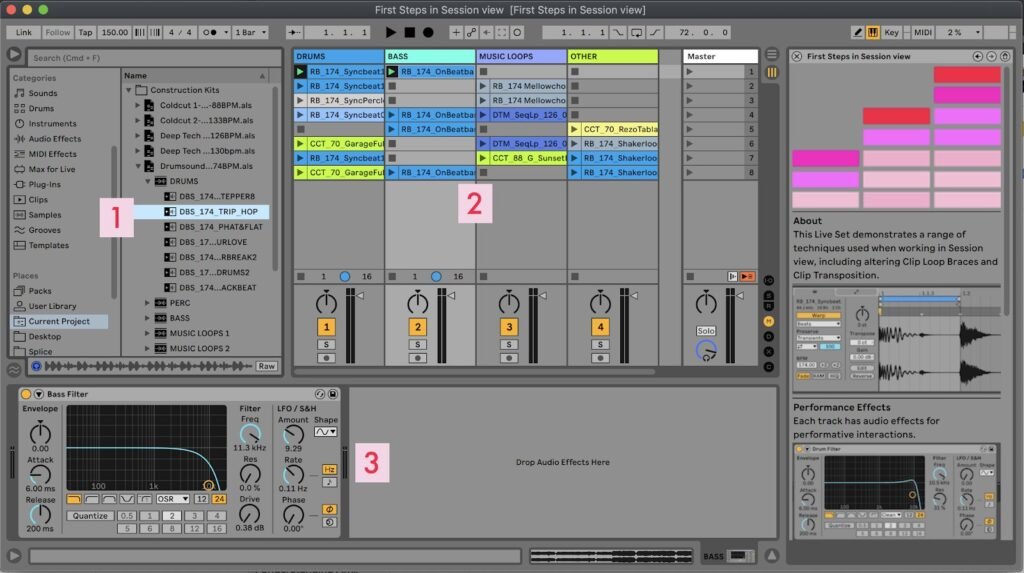
Session View:
- Non-linear Playground: Think of the Session View as your musical sketchpad. It’s designed for improvisation and experimentation, allowing you to trigger clips, loops, and samples in real-time. This view is your go-to for jam sessions, where you can mix and match musical ideas without being bound by a timeline.
- Scene Management: Scenes enable you to organize clips into rows, making it easy to launch a set of clips simultaneously. This is particularly useful during live performances or when you want to test how different sections of your track sound together.
- Performance Optimization: While Ableton Live is versatile, it may not be optimized for high track counts. A neat trick to improve performance is to clear the Session View of unused scenes and clips, ensuring a smoother workflow.
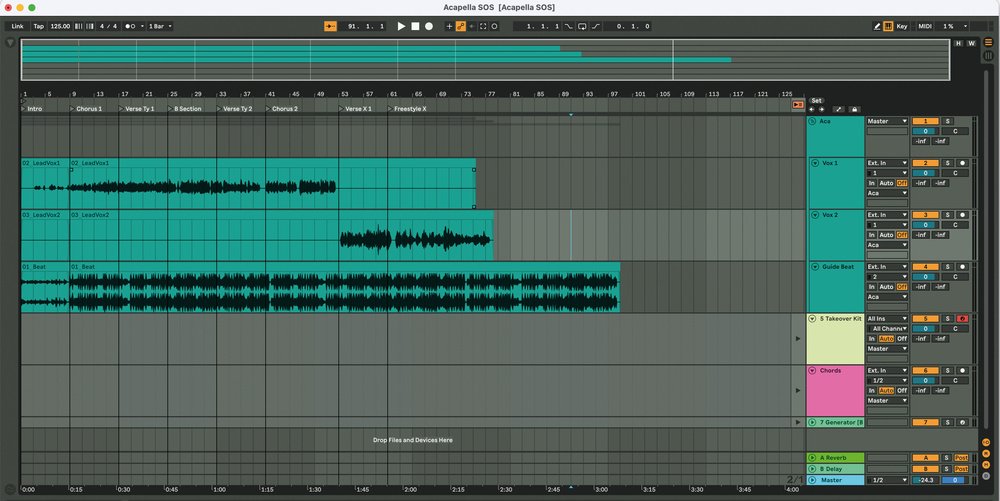
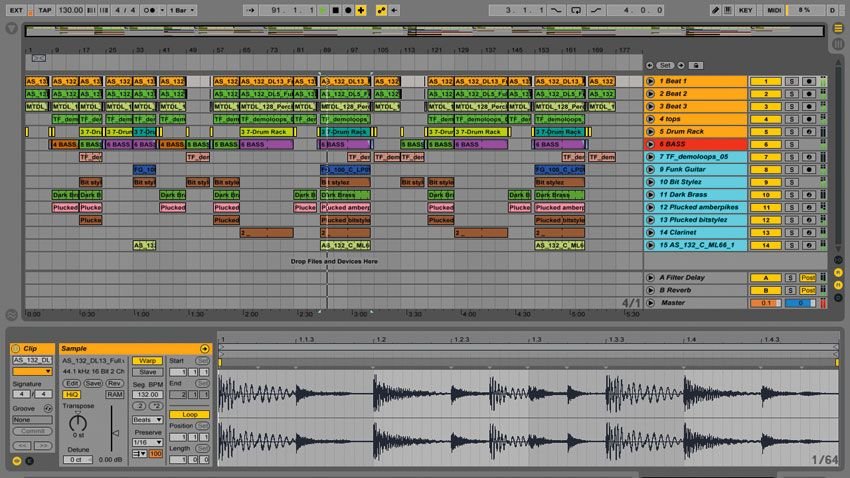
Arrangement View
- Linear Workflow: The Arrangement View offers a traditional, timeline-based approach to music production. It’s ideal for recording, editing, and fine-tuning your tracks. This view displays your tracks horizontally, allowing you to arrange your music precisely over time.
- Advanced Editing Tools: Boasting powerful editing capabilities, the Arrangement View lets you easily manipulate MIDI, audio clips, and effects. You can move, resize, and crossfade clips, adjust fades, and even change time signatures at any point in your arrangement.
- From Improvisation to Composition: One of Ableton Live’s standout features is the ability to record your Session View improvisations directly into the Arrangement View. This seamless transition from freeform experimentation to structured composition empowers you to capture creativity as it unfolds.
Transitioning Between Views:
- To fluidly move ideas from the Session to the Arrangement View, start by ensuring all tracks are unarmed. Hit the ‘Record to Arrangement’ button, launch your clips in any desired order, and use the ‘Tab’ key to toggle between views. Remember, playback from the Arrangement View can be initiated by clicking the ‘Back to Arrangement’ button, allowing you to refine your ideas into polished tracks.
Understanding and leveraging the distinct functionalities of the Session and Arrangement Views in Ableton Live will significantly enhance your music production process. Whether you’re laying down the foundation of a new track or finessing the details, these views offer the flexibility and control needed to bring your musical vision to life.
Building Your First Track
Building your first track in Ableton Live is an exciting journey into music production. Here’s how to start crafting a song that resonates with your artistic vision, using Ableton’s powerful features:
Crafting the Foundation
- Select an Instrument: Kick off by choosing an instrument, like Serum, for your track. Serum’s versatile sound palette makes it an excellent choice for various music genres.
- Create Chords: Start with bass notes and stack chords on top of the root note to build harmony. This method lays a solid harmonic foundation for your track.
- Sound Design: Modify your sound by adjusting the filter, setting oscillator A to four voices, and slightly detuning it. This adds richness and depth to your sound.
- Envelopes and Effects:
- Add a second envelope to modulate the filter cutoff, shaping the sound’s character.
- Incorporate delay and reverb effects to create a more complex and spacious sound.
Rhythm and Groove
- Set MIDI Clip Length: Ensure your MIDI clip is set to four bars, providing a structured loop to build upon.
- Add a Beat: Create a dynamic rhythm by drawing beats slightly early, adding a ‘swoosh’ effect into the next chord before the kick hits. This technique adds anticipation and groove to your track.
- Drum Pattern:
- Double-click in a clip slot to add MIDI notes for different drum sounds.
- Use a compressor on the chords with the kick as the side chain input, creating a pumping effect that’s essential in many electronic music genres.
Melody and Bass
- Lead and Arpeggio:
- Duplicate tracks for a lead or arpeggio. Utilize an arpeggiator to create captivating patterns that add movement to your track.
- Experiment with the envelopes of the arpeggio to craft unique sounds that stand out.
- Bassline:
- Create a base by duplicating the chords track and isolating the bass notes. Adjust the sound to fit seamlessly with the rest of your track.
- Add a sub-bass, rolling off higher frequencies to ensure clarity and punch in the low end.
- Harmonic and Melodic Elements:
- For harmonic context, create a drone sound using a MIDI clip and the ‘Dark Swarm’ sound from the ‘Ambient and Evolving’ category.
- Write a chord progression and accompanying bass line using piano and organ sounds, respectively. This lays the harmonic and rhythmic foundation of your track.
Final Touches
- Organize and Color-Code: Keep your project tidy by organizing and color-coding tracks and clips. This not only enhances visibility but also streamlines your workflow.
- Save Regularly: Protect your progress by saving your project frequently, avoiding any potential loss of your creative work.
By following these steps, you’re well on your way to building your first track in Ableton Live. Remember, experimentation and creativity are key. Don’t be afraid to tweak settings, try out different sounds, and play with the structure until you find what works best for your musical expression. Happy producing!
Incorporating MIDI and Audio Tracks
Incorporating MIDI and Audio Tracks into your Ableton Live project is a pivotal step towards creating a dynamic and textured musical composition. Here’s how to seamlessly add and manipulate both types of tracks to enrich your production:
MIDI Tracks:
- Adding MIDI Tracks:
- From Browser: Drag a sound from the browser directly onto an existing MIDI track. Ableton automatically installs the instrument on the track. Feel free to rename the track to suit your project’s organization.
- Blank MIDI Track: Use the “Create” menu and select “Insert MIDI Track” for a new, empty MIDI track ready for your creative input.
- Loading Sounds:
- Navigate through Ableton Live’s browser, exploring sounds by category or instrument. To load a sound onto a MIDI track, click and drag it from the browser, or double-click for automatic loading.
- Replacing Sounds: After laying down your MIDI data, changing the instrument or sound is straightforward. Load a new sound onto the MIDI track to replace the previous one, all while keeping your recorded data intact.
Audio Tracks:
- Creating Audio Tracks:
- From Browser: Dragging a sound from the browser into an empty space automatically creates a new track with the selected sound.
- Default Audio Track: Press ‘Command T’ (or ‘Ctrl T’ on Windows) to add a new audio track. Right-click the track, select your desired devices, and choose ‘Save as Default Audio Track’ for future projects.
MIDI and Audio Editing Tools:
- Ableton’s Sampler and Simpler: Celebrated for their non-destructive editing capabilities, these tools allow you to manipulate audio without altering the original files. They are invaluable for fine-tuning samples and creating unique sounds.
- MIDI Effects: Enhance your MIDI tracks with effects like:
- ARP: Generate captivating arpeggios and sequences.
- Envelope: Shape the volume and dynamics of your sounds.
- Melodic Steps: Create unique patterns and change note pitches effortlessly.
By integrating MIDI and audio tracks into your Ableton Live projects, you unlock a vast landscape of creative possibilities. Experimentation is key; try out different sounds, effects, and editing techniques to discover new textures and layers that will elevate your music production. Remember, Ableton Live is a powerful tool at your fingertips, designed to bring your musical visions to life with precision and creativity.
Creative Use of Effects and Plugins
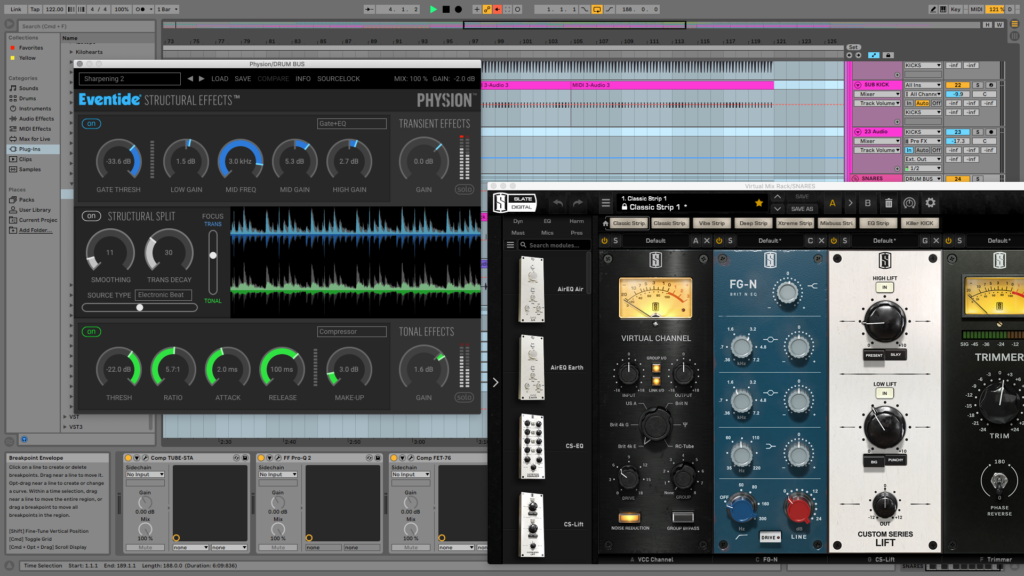
Harnessing the power of effects and plugins in Ableton Live can transform your tracks from good to extraordinary. Here’s how to creatively use these tools to add depth, texture, and character to your music:
Max for Live Devices for Innovation
- Custom Creations: Dive into Max for Live to build or tweak devices that cater exactly to your needs, from sequencers that align with your workflow to unique synthesizers that produce unheard sounds.
- Inspirational Presets: Explore devices like Phrasing and Random Marching Band for instant inspiration. These can introduce new rhythms and melodies you might not have considered, pushing your creativity to new heights.
Creative Effects for Depth and Texture
- Space Creation: Utilize reverb and delay effectively. For instance, employing the Ducker control in Ableton Live or Crystalline from Baby Audio can pull an instrument back in the mix, creating space without losing presence.
- Stereo Width: Enhance the stereo field with pingpong delay, making your track feel wider and more immersive as sounds bounce from left to right.
- Color and Character: Add warmth and grit with tools like amp, erosion, and distortion. Erosion, for example, can introduce additional frequencies, adding a unique texture to your sound.
- Shape Modulation: Leverage envelope followers to modulate effects parameters. This can dynamically alter the sound’s character in response to its amplitude, offering a more engaging listening experience.
External Effects for Unique Soundscapes
- Incorporate Hardware: Connect external effects like Zen Delay or CXM for analog warmth or digital precision. Routing audio through hardware units and back into Ableton can introduce a tactile element to your digital creations.
- Delay Techniques: Experiment with delay for more than just echo. Use it to create tape-style pitch effects or emulate the warmth of analog gear, adding a vintage feel to your tracks.
Remember, the key to creative use of effects and plugins is experimentation. Trust in the process, focusing on exploration and problem-solving rather than perfection. By blending Ableton Live’s vast array of built-in effects with external hardware and Max for Live devices, you’ll unlock new sonic territories and bring a distinctive flair to your music production.
Mixing and Mastering Basics
Diving into the mixing and mastering basics, the goal is to ensure your track not only sounds professional but also translates well across various listening environments. Here’s a structured approach to achieve that polished sound:
Gain Staging and EQ
- Gain Staging: Start by setting each track’s level to ensure there’s no clipping and maintain a balanced mix. Aim for about seven decibels of headroom. Use a custom Ableton Live rack consisting of a utility audio effect and a Voxengo Span plug-in for precise control.
- EQ Techniques:
- Subtractive EQ: Focus on cutting frequencies rather than boosting to avoid muddiness. Especially in the mid-range, identify and remove problem frequencies to clear space for each instrument.
- Low-End Management: High-pass filter any track that isn’t kick or bass to eliminate unnecessary low-end frequencies, enhancing clarity and preventing muddiness.
Compression and Headroom
- Master Track Compression: Apply compression to tame peaks that exceed a specific decibel threshold, ensuring a consistent level across the track.A glue compressor can tighten the low end, focusing on the kick drum’s fundamental frequency for a solid foundation.
- Maintaining Headroom: Critical for dynamic adjustments and preventing distortion during the mastering process. Monitor the master track for any red indicators, signaling clipping.
Final Touches and Exporting
- Limiter Settings: Apply a final limiter to increase loudness while avoiding distortion. Set the look-ahead time to 6 ms and the ceiling to -1 dB, adjusting the gain until distortion is just noticeable, then back off by 1 dB.
- Export Settings: Choose 44100 kHz, 16 or 24 bit, based on your needs. Select the appropriate dithering option (POWr1 for soft/acoustic, POWr2 for pop, POWr3 for hip hop/EDM) and ensure normalization is off for the truest representation of your mix.
- Monitoring Levels: Use tools like the Ulean Loudness Meter to aim for around -10 LUFS, ensuring your track achieves a competitive loudness without sacrificing dynamic range.
By adhering to these foundational steps, you’re well on your way to delivering a mix and master that stands out, regardless of where it’s played. Remember, mixing and mastering are as much about technical precision as they are about creativity. So, experiment, trust your ears, and don’t hesitate to consult our other resources for more in depth descriptions and techniques.
Exporting and Sharing Your Music
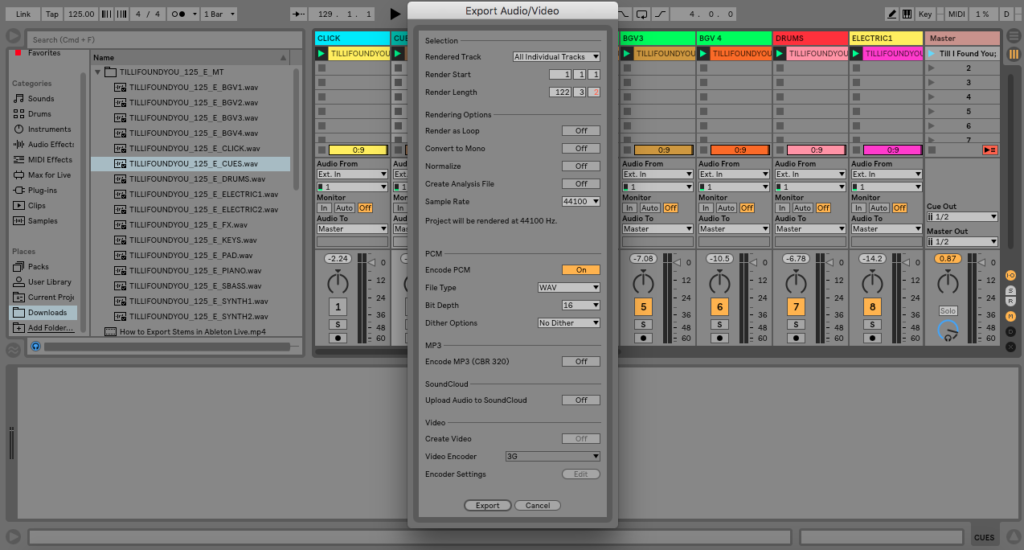
When you’ve poured your heart and soul into a track, the next step is sharing it with the world. Ableton Live streamlines this process with intuitive exporting and sharing features. Here’s a breakdown of how to bring your music from the studio to listeners’ ears:
Exporting Your Music
- Initiating Export: Navigate to File > Export Audio/Video or use the shortcut Shift + Cmd + R on a Mac or Shift + Ctrl + R for Windows.
- Choosing Export Options:
- Master: Exports the final mix.
- All Individual Tracks: Each track as a separate audio file.
- Selected Tracks Only: Only the tracks you’ve selected.
- Include Return and Master Effects: Opt to include effects on Return and Master tracks with each exported track.
- Audio Settings:
- Select your preferred Sample Rate, PCM, Bit Depth, and Dither Option.
- For direct online sharing, tick the MP3 option to upload to platforms like SoundCloud.
Preparing for Export
- From Arrangement View: Unmute all tracks you wish to render and ensure no Session View clips are launched.
- From Session View: Live exports all clips with activated clip launch buttons, capturing the dynamic essence of live performances.
Sharing and Collaborating
- Transferring Projects: Use the ‘Collect All and Save’ option to bundle all necessary files, making your set easily transferable to another computer. Remember, all required plug-ins must be installed separately on the receiving computer.
- Synchronization: Ableton Live’s Link technology facilitates easy synchronization with other devices, paving the way for collaborative projects and performances.
By following these steps, your music is not just a personal journey but a shared experience. Whether it’s a polished track ready for release or a collaborative project in the making, Ableton Live’s exporting and sharing capabilities ensure your music reaches ears across the globe.
Compare Ableton with other major players like Fl Studio and Logic Pro!
Conclusion
Embarking on the journey of mastering Ableton Live, as outlined in this tutorial, paves the way for aspiring musicians to transform their creative visions into tangible pieces of music. From setting up your first project, exploring the depth of Session and Arrangement views, to building and polishing your first track, each step is meticulously designed to elevate your music production skills. The intricacies of MIDI and audio tracks, coupled with the strategic use of effects and plugins, not only enrich the sound but also infuse tracks with a unique character. Moreover, the comprehensive guide on mixing and mastering basics ensures that the final output resonates well across different platforms, epitomizing professionalism and sonic clarity.
FAQs
1. Is it possible to self-teach Ableton? Yes, you can learn Ableton on your own. It is similar to learning any new software or musical instrument. Initially, it may seem daunting, but with consistent practice and the right guidance, you will become proficient. Many experienced users recommend experimenting and discovering the program’s features independently.
2. What version of Ableton is recommended for beginners? Ableton Live 11 is highly recommended for beginners. It was originally developed for live electronic performances and has since become a favored Digital Audio Workstation (DAW) for songwriters and producers. Its user-friendly interface and robust features make it an excellent choice for those new to music production.
3. How much time is required to learn Ableton effectively? The time it takes to learn Ableton varies, but the general consensus suggests that it can take between six months to a year to gain a comprehensive understanding of the software on your own. It’s important to grasp the basics before attempting more complex tasks, so patience and regular practice are key.
4. Is Ableton an appropriate DAW for those just starting out in music production? Ableton Live is considered one of the best DAWs for beginners, with Apple Logic Pro as another suitable option. According to a wide array of producer-led tutorial videos, many music producers prefer to use Ableton for teaching, and its popularity has been growing steadily over the past five years.
This post may contain affiliate links. If you make a purchase through these links, we may earn a small commission at no additional cost to you.